Testing toolkit ) 
With the testing toolkit we can guide you to write robust, reusable integration tests for connectors and utilities in Atlan.
Writing tests for non-toolkit based scripts  
You can write integration tests for existing scripts in the marketplace-csa-scripts repository, even if they are not based on package toolkits. These tests help verify script behavior end-to-end in a real Atlan tenant.
We'll begin by performing minimal refactoring of the existing script, as it's necessary to enable writing integration tests.
Step 1: Rename directory to snake_case
If the script is in kebab-case directory, convert it to snake_case.
Do this just after renaming
Update references in mkdocs.yml, delete the old directory, and verify imports/links still work.
For example:
Before:
scripts/
└── designation-based-group-provisioning/
    ├── main.py
    ├── index.md
    └── tests/
        └── test_main.py
After:
scripts/
└── designation_based_group_provisioning/
    ├── main.py
    ├── index.md
    └── tests/
        └── test_main.py
Step 2: Refactor main.py
DO
- Refactor the script without altering logic or flow.
- Wrap all logic inside functions.
- Create a single entry point:
main(args: argparse.Namespace) - Call helper functions from
main()— each should receive only requiredargsorinputs.
DO NOT
- Rename or restructure existing functions.
- Change the sequence or logic flow.
- Modify argument parsing.
- Add/remove logging unless required for debugging.
Example refactored main.py:
| main.py | |
|---|---|
1 2 3 4 5 6 7 8 9 10 11 12 13 14 15 16 17 18 19 20 21 22 23 24 25 26 27 28 29 30 31 32 33 34 35 | |
Step 3: Add integration tests
Prerequisites: Install test dependencies
Before writing tests, you need to install the required testing dependencies. Choose one of the following methods:
Option 1: Install from package (recommended if available)
pip install -e ".[test]"
Option 2: Install explicitly with requirements file
- Create a
requirements-test.txtfile:
| requirements-test.txt | |
|---|---|
1 2 3 4 5 6 | |
- Install the dependencies:
pip install -r requirements-test.txt
Ready to proceed
Once dependencies are installed, you can proceed to write your integration tests.
Test layout for test_main.py
Create a tests/ folder if not already present:
scripts/
└── my_script/
    ├── main.py
    └── tests/
        └── test_main.py
| Function | Purpose |
|---|---|
test_main_functions |
Test small pure helper functions individually (useful for quick validation of logic) |
test_main |
Run the main() function with a config to simulate full script execution (end-to-end) |
test_after_main |
(optional) Validate side effects after running the script, such as asset creation, retrieval, audit logs, etc. |
Example Reference:
For a complete real-world example, see the integration test for designation_based_group_provisioning/main.py.
Recommended testing strategy for scripts
When writing integration tests for scripts in marketplace-csa-scripts, follow these practices to ensure reliable and production-relevant test coverage:
Best practices
✅ DO:
- Test against real Atlan tenants - Integration tests should interact with actual Atlan instances to validate real behavior
- Use environment variables for all secrets and configuration values
- Load configuration safely via
.envfiles, CI/CD secrets, or shell configs — never hardcode sensitive data
🔄 MOCK ONLY WHEN NECESSARY:
Use mocking or patching sparingly, and only for:
- External/third-party API calls (non-Atlan services)
- Database interactions not managed by Atlan
- Non-deterministic behavior (e.g., random data, time-based logic)
❌ AVOID:
- Mocking
pyatlanclients or any Atlan interactions unless absolutely necessary
Common pitfalls to avoid
❌ Don't hardcode sensitive values
- Never hardcode API keys, user-specific secrets, or test asset names
- Instead: Use environment variables and
pyatlan.test_utils.TestId.make_unique()for unique naming - Best practice: Generate test objects in fixtures for reusability and proper cleanup
❌ Don't use fake data
- Avoid placeholder data that doesn't reflect real Atlan entity structures
- Instead: Use data that closely mirrors production for meaningful tests
❌ Don't mock Atlan client methods
- Integration tests must execute real operations against live Atlan tenants
- Why: Mocking undermines the purpose of integration testing and may miss regressions
- Remember: You're testing the integration, not the individual components
Full example (expand for details)
| test_main.py | |
|---|---|
1 2 3 4 5 6 7 8 9 10 11 12 13 14 15 16 17 18 19 20 21 22 23 24 25 26 27 28 29 30 31 32 33 34 35 36 37 38 39 40 41 42 43 44 45 46 47 48 49 50 51 52 53 54 55 56 57 58 59 60 61 62 63 64 65 66 67 68 69 70 71 72 73 74 75 76 77 78 79 80 81 82 83 84 85 86 87 88 89 90 91 92 93 94 95 96 97 98 99 100 101 102 103 104 105 106 107 108 109 110 111 112 113 114 115 116 117 118 119 120 121 122 123 124 125 | |
Writing tests for non-toolkit based scripts using Cursor AI code editor  
You can leverage AI code editors like Cursor to help with refactoring existing scripts and generating integration tests for the marketplace-csa-scripts repository. However, it's important to be aware of the potential issues and risks that may arise.
Step 1: Setup Cursor rules
To ensure the AI agent provides the desired results based on your prompts, you need to set up custom rules for your code editor.
-
Create a rules file:
- Create the file
.cursor/rules/csa-scripts-tests.mdcin your project directory. - You can start by copying the
example ruleand modifying them to match your needs.
- Create the file
-
Refine rules over time:
- As you use AI for refactoring and generating tests, you can refine the rules. By adding more context (e.g: multiple packages and varied test patterns), the AI will become more effective over time, improving its results.
Step 2: Running the agent with the defined Rules
To run the AI agent with the defined rules, follow these steps:
-
Open the cursor chat:
- Press
cmd + Lto open a new chat in the Cursor IDE. - Click on
Add Context, then selectcsa-scripts-tests.mdcto load the rules you defined.
- Press
-
Provide a clear prompt:
- After loading the rules, provide a clear prompt like the following to refactor your script and add integration tests:
Refactor `scripts/asset-change-notification/main.py` using the latest Cursor rules and add integration tests in `scripts/asset_change_notification/tests/test_main.py` to ensure functionality and coverage.
- After loading the rules, provide a clear prompt like the following to refactor your script and add integration tests:
-
Review results:
- Once the AI completes the task, review the generated results carefully. You may need to accept or reject parts of the refactoring based on your preferences and quality standards.
Common Issues
-
Low accuracy across models: AI results can be highly inconsistent, even after experimenting with different combinations of rules and prompts. In many cases, only a small fraction of attempts yield satisfactory results.
-
Inconsistent output: Regardless of using detailed or minimal rules, and trying various AI models (
Claude 3.7, Sonnet 3.5, Gemini, OpenAI), the output often lacks consistency, leading to unsatisfactory refactorings.
Risks in refactoring
-
Code deletion: AI can unintentionally remove important parts of the original code during refactoring.
-
Unnecessary code addition: AI might add code that changes the behavior of the script, potentially introducing bugs.
-
Flaky or insufficient tests: Generated tests are often overly simplistic or unreliable. AI may also mock components that should not be mocked, leading to incomplete test coverage.
Mocking / Patching third party HTTP interactions  
When do you need this?
This approach is essential when building connectors or utility packages that interact with external systems, such as:
- Fetching data from third-party APIs
- Integrating with external databases
- Calling web services that require authentication
The problem with real API calls in tests
❌ Challenges with direct API testing: - Requires credentials and environment configurations - Difficult to integrate into automated test suites - Slow execution times, especially in CI/CD pipelines - Hard to maintain as more integrations are added - External service availability can break tests
The solution: VCR (Video Cassette Recorder)
✅ Benefits of using VCR: - Record real API interactions once during development - Replay saved responses in tests without network calls - Fast, reliable, and reproducible tests - Works offline and in CI environments
The vcrpy library captures and saves HTTP interactions in files called "cassettes" during development.
How VCR works
The workflow:
- Record → Run tests once with real API calls to record interactions
- Save → Store responses in local "cassette" files (
YAMLorJSON) - Replay → Future test runs use saved responses instead of real HTTP requests
- Customize → Optionally modify saved responses to simulate different scenarios
The benefits:
- 🚀 Faster tests - No network latency
- 🔒 Reliable - No dependency on external service availability
- 🔄 Reproducible - Same responses every time
- 🛠️ Configurable - Easy to simulate edge cases and error conditions
Hybrid approach
VCR sits between integration and unit tests — it uses real API behavior but avoids needing a live environment every time. This makes tests easier to maintain, faster to run, and more configurable as your project grows.
Write VCR-based integration tests
For this example, we are using httpbin.org, which provides a simple and fast way to test vcrpy by recording HTTP request and response interactions.
Have you installed test dependencies?
Before writing tests, make sure you've installed the test dependencies in your local environment. You can do that by running the following command:
pip install -e ".[test]"
Alternatively, you can explicitly install the required packages
by creating a requirements-test.txt file and installing them using:
| requirements-test.txt | |
|---|---|
1 2 3 4 5 6 7 8 9 10 | |
| tests/integration/test_http_bin.py | |
|---|---|
1 2 3 4 5 6 7 8 9 10 11 12 13 14 15 16 17 18 19 20 21 22 23 24 25 26 27 28 29 30 31 32 33 34 35 36 37 38 39 40 41 42 43 44 45 46 47 48 49 50 51 52 53 54 55 56 57 58 59 60 61 62 63 64 65 66 67 68 69 70 71 72 73 74 75 76 77 78 79 80 81 | |
-
Start by importing the
BaseVCRclass frompyatlan.test_utils.base_vcr, which already includes base/default configurations for VCR-based tests, such asvcr_config,vcr_cassette_dir, and custom serializers likepretty-yaml(default for cassettes) andpretty-json(another cassette format). -
(Optional) To override any default
vcr_config(), you can redefine the@pytest.fixture->vcr_config()inside your test class. For example, you can update the serializer to use the custompretty-jsonserializer. -
(Optional) To override the default cassette directory path, you can redefine the
@pytest.fixture->vcr_cassette_dir()inside your test class. -
When writing tests (e.g
test_my_scenario), make sure to add the@pytest.mark.vcr()decorator to mark them as VCR test cases. For each test case, a separate cassette (HTTP recording) will created inside thetests/vcr_cassettes/directory.
Once you run all the tests using:
pytest tests/integration/test_http_bin.py
Since this is the first time running them, vcrpy will record all the HTTP interactions automatically and save them into the tests/vcr_cassettes/ directory 
For example, here's a saved cassette for the TestHTTPBin.test_httpbin_post test:
| tests/vcr_cassettes/tests.integration.test_http_bin/TestHTTPBin.test_httpbin_post.yaml | |
|---|---|
1 2 3 4 5 6 7 8 9 10 11 12 13 14 15 16 17 18 19 20 21 22 23 24 25 26 27 28 29 30 31 32 33 34 35 36 37 38 39 | |
vcrpy not sufficient for your use case? 
There might be cases where VCR.py's recorded responses are not sufficient for your testing needs, even after applying custom configurations. In such scenarios, you can switch to using Python's built-in mock/patch object library for greater flexibility and control over external dependencies.
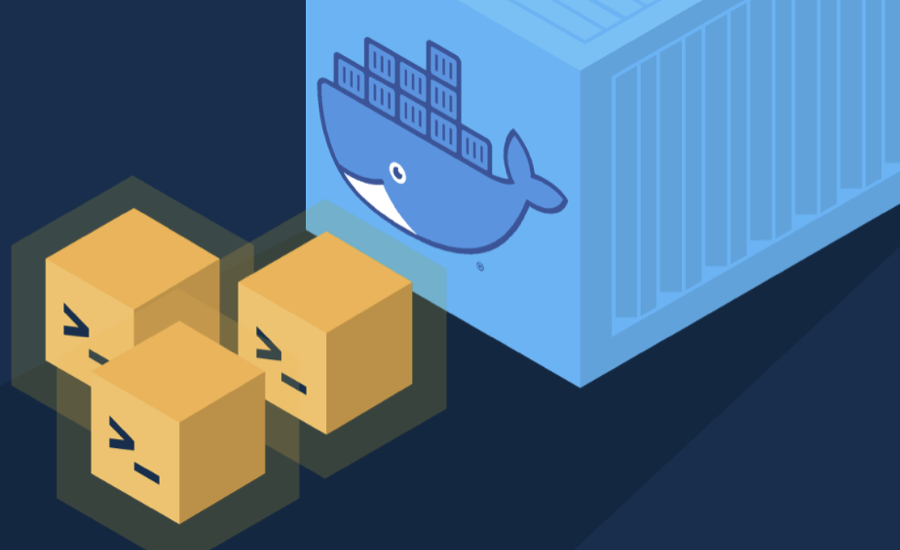
Containerizing marketplace scripts  
Overview
When your script is ready for production deployment, you'll need to create package-specific Docker images for reliable and consistent execution across different environments.
Why containerize? - ✅ Consistent execution across all environments - ✅ Proper versioning and rollback capability - ✅ Isolated dependencies prevent conflicts - ✅ Automated deployment via CI/CD pipelines
Prerequisites
Complete these steps first
Before containerizing your script, ensure you have:
- ✅ Completed script refactoring from the Writing tests for non-toolkit based scripts section
- ✅ Working integration tests that validate your script functionality
- ✅ Script directory renamed to
snake_caseformat (if applicable)
Required files for containerization
File checklist
For each package script (e.g scripts/designation_based_group_provisioning/), you need to create 5 essential files:
- 📝
version.txt- Semantic versioning - 🐳
Dockerfile- Container image definition - 📦
requirements.txt- Package dependencies - 🧪
requirements-test.txt- Testing dependencies - 🔒 Vulnerability scan (using
snykCLI)
Let's create each file step by step:
1. version.txt - semantic versioning
Create a version file to track your package releases:
| version.txt | |
|---|---|
1 | |
Semantic versioning guidelines
You should use .dev suffix for development 
Follow semantic versioning principles:
- MAJOR version: incompatible API changes
- MINOR version: backwards-compatible functionality additions
- PATCH version: backwards-compatible bug fixes
2. Dockerfile - package-specific image
Create a production-ready Docker image for your script:
| Dockerfile | |
|---|---|
1 2 3 4 5 6 7 8 9 10 11 12 13 14 15 16 17 18 19 20 21 22 23 24 25 26 27 28 29 30 31 32 33 | |
About pyatlan-wolfi-base
Use pyatlan-wolfi-base images for package scripts. The image is built on top of Chainguard Wolfi image with pyatlan. We use it because it is a vulnerability-free open source image and this image will auto-publish to ghcr on every pyatlan release (see image tag contains suffix e.g: 8.0.1-3.13 -> pyatlan_version-python-version). If you want to use a custom pyatlan-wolfi-base for development (with different pyatlan version, pyatlan branch or python version) you can also do this by manually triggering the GH workflow. Following are the inputs for that workflow:
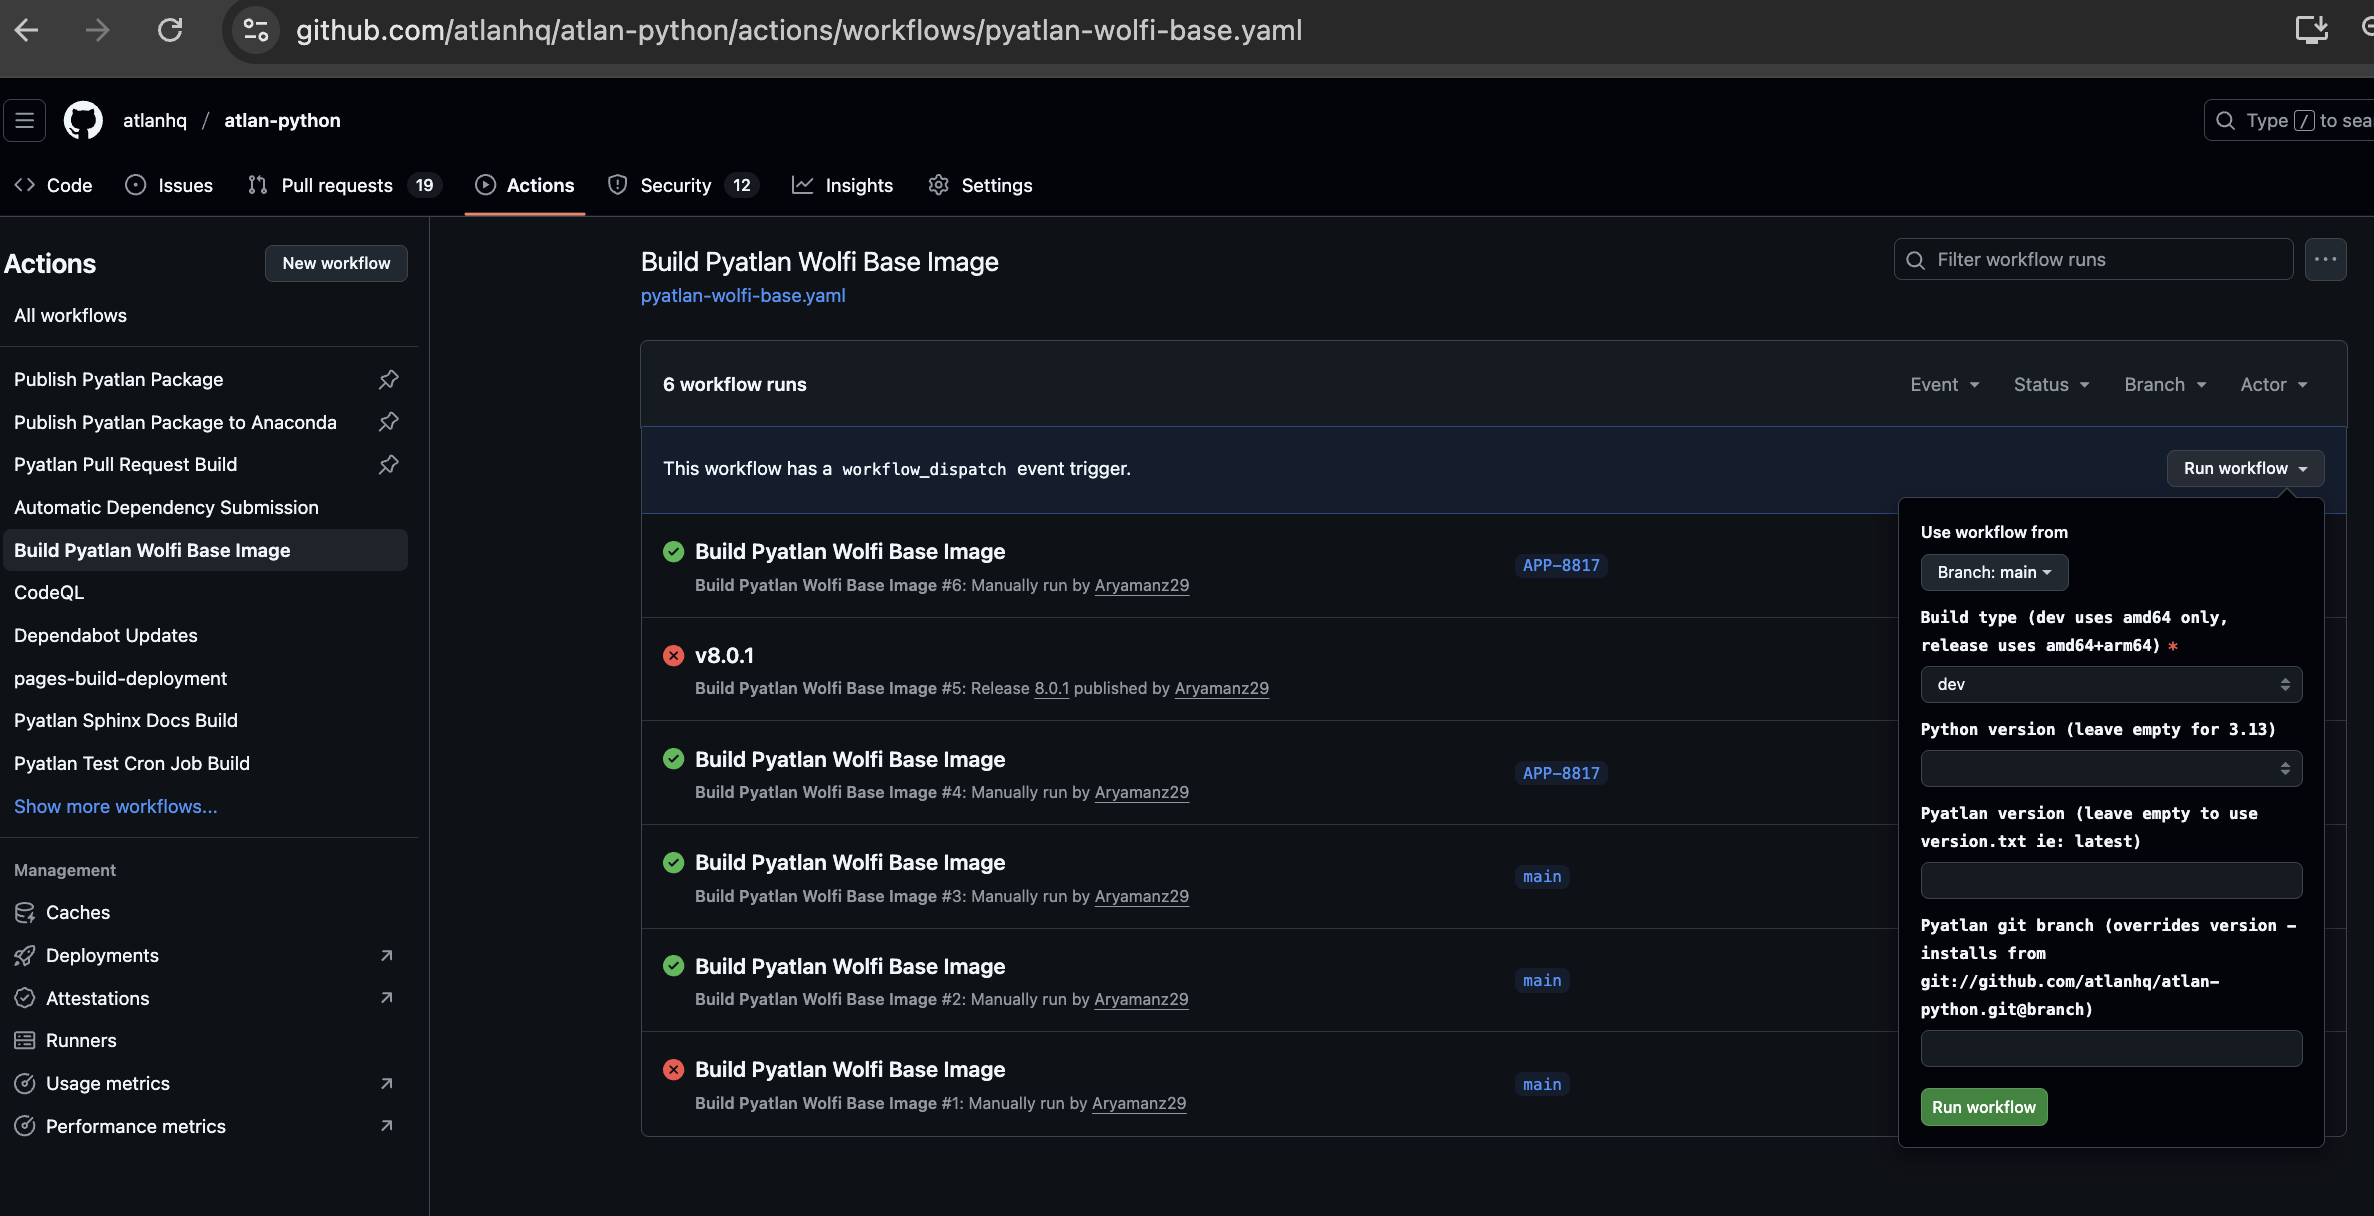
- Navigate to Build Pyatlan Wolfi Base Image workflow
- Click "Run workflow" and provide the following inputs:
| Input | Description | Example | Required |
|---|---|---|---|
| Branch | Use workflow from | main |
✅ |
| Build type | Build type (dev uses amd64 only, release uses amd64+arm64) |
dev |
✅ |
| Python version | Python version (leave empty for 3.13) |
3.11 |
❌ |
| Pyatlan version | Published pyatlan version (pull from PyPI, (leave empty to use version.txt ie: latest) |
7.2.0 |
❌ |
| Pyatlan git branch | Pyatlan git branch (overrides version - installs from git://github.com/atlanhq/atlan-python.git@branch) |
APP-1234 |
❌ |
3. requirements.txt - package dependencies
Generate your package dependencies using pipreqs and include required OTEL logging dependencies:
| requirements.txt | |
|---|---|
1 2 3 4 5 6 7 8 9 10 11 | |
Generating requirements automatically
Use pipreqs to automatically detect and generate your package dependencies:
```bash # Install pipreqs if not already installed pip install pipreqs
# Generate requirements for your package pipreqs /path/to/your/package --force
# Example for a specific script pipreqs scripts/designation_based_group_provisioning --force ```
4. requirements-test.txt - testing dependencies
Create testing-specific dependencies for CI/CD and local development:
| requirements-test.txt | |
|---|---|
1 2 3 4 5 6 7 8 9 10 | |
5. Run snyk vulnerability scan:
We also recommend running a snyk vulnerability scan on your requirements so that any issues can be fixed before doing a GA release.
Step-by-step security scanning:
-
Authenticate with Snyk CLI:
Follow the prompts to login via SSO and grant app accesssnyk auth -
Scan project dependencies:
# Ensure your virtual environment is active and dependencies are installed snyk test -
Scan Docker image (optional):
# After building your Docker image locally snyk container test ghcr.io/atlanhq/designation_based_group_provisioning:1.0.0dev-0d35a91 --file=Dockerfile -
Create exceptions policy (if needed):
If there are vulnerabilities that don't impact your project, create a .snyk policy file:
# designation_based_group_provisioning/.snyk
# Snyk (https://snyk.io) policy file, patches or ignores known issues.
version: v1.0.0
# ignores vulnerabilities until expiry date; change duration by modifying expiry date
ignore:
  'snyk:lic:pip:certifi:MPL-2.0':
    - '*':
        reason: 'MPL-2.0 license is acceptable for this project - certifi is a widely used certificate bundle'
Development workflow
Testing your containerized package
Use the Build Package Test Image workflow for rapid development and testing:
Steps:
-
Navigate to the workflow: Go to Build Package Test Image
-
Trigger the build: Click "Run workflow" and provide the required inputs:
| Input | Description | Example | Required |
|---|---|---|---|
| Branch | Select your development branch from dropdown | APP-001-containerize-dbgp |
✅ |
| Package Directory | Name of the package directory | designation_based_group_provisioning |
✅ |
| Package Name | Image name (defaults to kebab-case of directory) | designation-based-group-provisioning |
❌ |
| Version Tag | Custom version tag (defaults to version.txt-GITHASH) | 1.0.0-dev |
❌ |
The workflow will build a dev image with tag format:
ghcr.io/atlanhq/designation-based-group-provisioning:1.0.0-dev-8799072
Benefits of development testing
🚀 Rapid iteration - Test containerized changes without affecting production
🔄 Environment consistency - Same container environment as production
✅ Integration validation - Verify your script works in containerized context
Production release workflow
Step 1: Prepare for GA release
Before creating your pull request:
-
Update version.txt: Ensure the version reflects your changes (final GA version)
version.txt1.0.0 -
Update HISTORY.md: Document all changes in this release
HISTORY.md 1 2 3 4 5 6 7 8 9 10 11
## 1.0.0 (July 1, 2025) ### Features ... ### Bug Fixes ... ### Breaking Changes ... ### QOL Improvements - Migrated package to build specific docker image. -
Verify integration tests: Ensure all tests pass locally
pytest tests/ -sOR run tests with coverage:
coverage run -m pytest tests && coverage report
Step 2: Create pull request
-
Create PR with your containerization changes:
- Include all required files (
Dockerfile,version.txt,requirements.txt, etc.) - Add or update integration tests following the testing guidelines
- Update documentation if needed
- Include all required files (
-
PR validation: The automated CI pipeline will:
- Run unit and integration tests
- Validate Docker build process
- Check code quality and coverage
- Verify all required files are present
Integration tests required
If your package doesn't have integration tests, this is the perfect time to add them following the testing toolkit guidelines. The CI pipeline expects comprehensive test coverage for production releases.
Step 3: Merge and deploy
- Review and approval: Get your PR reviewed and approved
- Merge to main: Once merged, this automatically triggers:
- GA image build: Creates production image with semantic version tag
- Registry publication: Publishes to GitHub Container Registry
-
Deployment preparation: Image becomes available for Argo template updates
-
Final GA image: Your production image will be tagged as:
ghcr.io/atlanhq/designation-based-group-provisioning:1.0.0
Step 4: Update Argo templates
After the GA image is built, you need to update your package's Argo workflow template to use the new containerized image. This involves two main changes:
- Remove the git repository artifact (scripts are now embedded in the Docker image)
- Update the container configuration to use the new image and module path
Example PR: marketplace-packages/pull/18043
Key changes required:
inputs:
  artifacts:
-   - name: scripts
-     path: "/tmp/marketplace-csa-scripts"
-     git:
-       repo: git@github.com:atlanhq/marketplace-csa-scripts
-       insecureIgnoreHostKey: true
-       singleBranch: true
-       branch: "main"
-       revision: "main"
-       sshPrivateKeySecret:
-         name: "git-ssh"
-         key: "private-key"
    - name: config
      path: "/tmp/config"
      # ... other artifacts remain unchanged
container:
+ image: ghcr.io/atlanhq/designation-based-group-provisioning:1.0.0
  imagePullPolicy: IfNotPresent
  env:
    - name: OAUTHLIB_INSECURE_TRANSPORT
      value: "1"
    # ... other env vars remain unchanged
- workingDir: "/tmp/marketplace-csa-scripts"
  command: [ "python" ]
  args:
    - "-m"
-   - "scripts.designation_based_group_provisioning.main"
+   - "designation_based_group_provisioning.main"
Why these changes are needed:
- No more git clone: Scripts are now embedded in the Docker image, eliminating the need to clone the repository at runtime
- Simplified module path: Direct import from the package directory instead of the nested
scripts.path - Cleaner execution: Container starts directly in the appropriate working directory (
/app) - Better security: No SSH keys needed for git access during workflow execution
Once merged, this will automatically deploy your containerized script across all Atlan tenants via the atlan-update workflow 
Production deployment complete
Your script is now fully containerized and ready for production deployment across all Atlan tenants with:
- ✅ Consistent execution environment
- ✅ Proper versioning and rollback capability
- ✅ Comprehensive testing coverage
- ✅ Automated CI/CD pipeline integration
Best practices for containerized scripts
Development practices
| Practice | Description |
|---|---|
| 📝 Version management | Always update version.txt before creating PRs |
| 🔒 Dependency pinning | Use specific version ranges in requirements.txt for stability |
| 🧪 Comprehensive testing | Ensure integration tests cover containerized execution paths |
| 📚 Documentation | Keep HISTORY.md updated with meaningful change descriptions |
Security considerations
| Security Area | Best Practice |
|---|---|
| 🔄 Base image updates | Regularly update your base Python image for security patches |
| 🔍 Dependency scanning | Monitor for security vulnerabilities in your dependencies |
| 🔐 Secret management | Never hardcode secrets in Docker images - use environment variables |
| 🔍 Image scanning | Enable container scanning in your CI/CD pipeline |